Card, Challenge

Bunny Wagon – Di’s Digi Stamps

Hello, all you happy Stampers out there!

I am here today sharing a card for a Challenge at The Outlawz. I am so excited to show you my card/entry.

The challenge that I entered was a progressive challenge.

Not know what a progressive challenge is? That is ok, I will explain.

You enter the challenge and you will either have to purchase your first digi stamp or they will provide you with one. In this case, they provided me with a stamp for free. You use the digi stamp in a creation of your own, such as a card or scrapbook page.

You will then add your photo to your blog (like I am doing here) or to any social media and also to the challenge site (you can find challenge blogs all over the internet and even on Facebook).

After the entry has closed and you have uploaded your image before the close date, they will provide you with another image to use for free! Exciting right?!?!? I love them and getting to see how everyone else used the same image.

The image I was provided with was from Di’s Digi Stamps (https://www.disdigistamps.com/) <== Link to Di’s Digi Stamp store

challenge2bblog2bblinkie
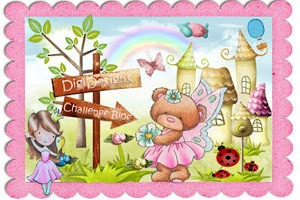
Click the image above to go to Di’s Designs Challenge Blog – Yep Stampers, they have their own challenge blog! wp1809452

Here is the card I created.

Di's Digi Stamp - Bunny wagon

I printed the image out on Neenah exact index – white, smooth and 110 pounds. I trimmed it to fit my card base and colored it!
To color the image I used Copic Markers, Prismacolor Premier colored pencils, Touch Five markers, and also Prisma Color Premier marker.

Links for products are below:

Copic Sketch Markers
Copic Sketch Markers – $5.24

from: Blick Art Materials

Touch Twin Brush Markers and Sets
Touch Twin Brush Markers and Sets – $4.79

from: Blick Art Materials

Prismacolor Colored Pencils and Sets
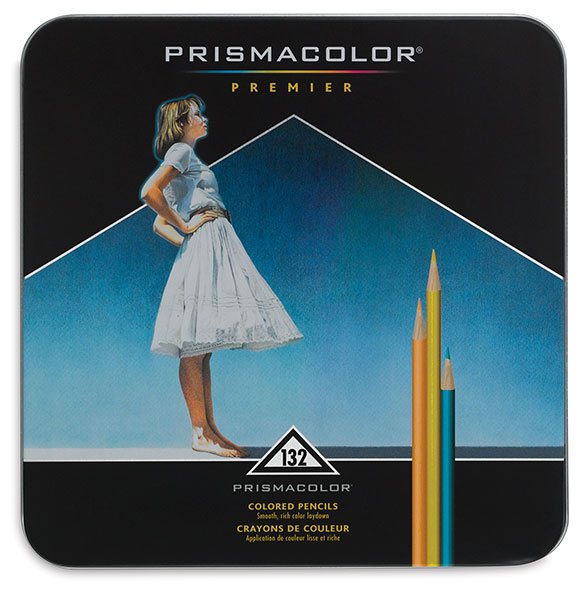
Prismacolor Colored Pencils and Sets – $1.27

from: Blick Art Materials

Prismacolor Premier Double-Ended Art Markers
Prismacolor Premier Double-Ended Art Markers – $3.25

from: Blick Art Materials

Neenah Exact index White cardstock
Neenah Exact Index 110lb Cardstock

from: Concord Supplies

Thank you for stopping by and please follow me and comment below.

signature

Card

Mermaid

Hello, all of you wonderful people 🙂

Today I am sharing with you an image from one of the coloring books by Jade Summer. This image can be found in the Mermaids Coloring Book (here is the link http://amzn.to/2mW9Nc1 ) it can also be found in a Coloring Book that consists of a compilation of several of the coloring books that they offer (it can be found here http://amzn.to/2Bi6px0 ).

Here it is.. Please leave a comment below and let me know what you think!

Jade Summer - Mermaid


Happy Stampin’
signature

Card, Give Away

All Inclusive Kits and Give Away

All-Inclusive kits!! These are perfect for beginners and experienced stampers! Great gift idea!
annual17_p010a
Soft Sayings card kit –
* Includes set of 15 photopolymer stamps
*clear stamp block
*20 printed card bases and coordinating printed envelopes
*giftable kraft box
*die-cut accents,
*Stampin’ Spot,
*Baker’s Twine,
*washi tape,
*Stampin’ Dimensionals
Annual17_p014_a
Oh Happy Day card kit – Kit includes
* Set of 13 photopolymer stamps
* 20 card bases and coordinating envelopes
* Giftable kraft box
* Die-cut glittered chipboard shapes
* Embossed sheets
* Printed die-cut images
* Die-cut gold foil sheet
* Die-cut white sheets
* Basic Black Archival Stampin’ Spot
* Printed color doilies
* Baker’s Twine
* Glittered dots
* Stampin’ Dimensionals
* Acrylic stamp block
 
 
Use Hostess Code N49JSQ6B
 
Each order this weekend will receive an exclusive set of tutorials and entered into a drawing for a free stamp set of my choice

signature

Card

Thank you – Leaf

20161129_203944

Fall colored thank you card.

Here is how to create it 🙂


Cut card base (8 X 5 1/2″ )
Score base at 4 1/4″ and fold

cut darker color for top of card (4 1/4″ X 5 1/2″ )

using a sponge dauber apply color to a scrap piece of paper large enough for the framelit die to fit in. Cut out the leaf and ink the edges.

Using wink of stella draw in the veins of the leaf and apply glitter to the edge of the leaf.

Using tear and tape adhesive attach burlap ribbon to card

create a messy circle with the gold trim and attach it to the front of the card using the tear and tape adhesive.

Place leaf over top and adhere it with Stampin’ dimensionals.

punch out label and stamp sentiment

Attach it to the top of the burlap ribbon using stampin dimensional’s.


Card is entered into Cards in Envy challenge – Thank You Card

Happy Stampin’

signature


Product List